
 |
|
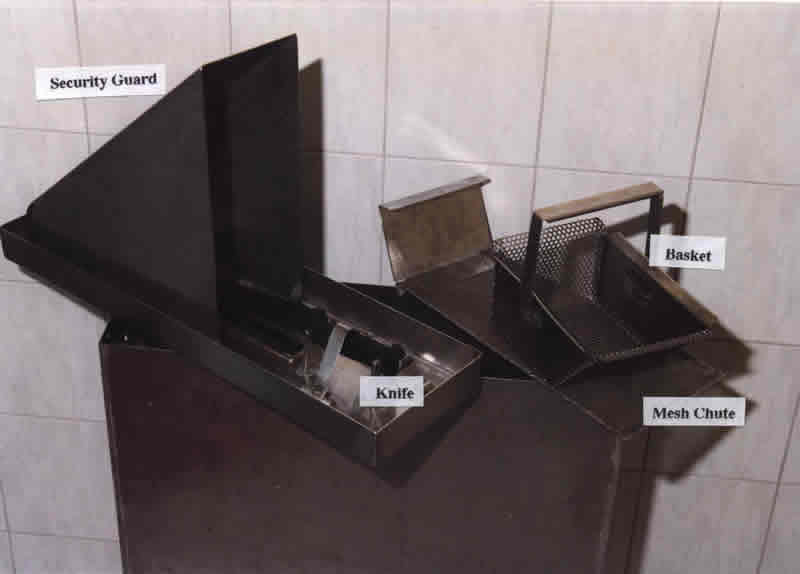
The Sunshine Gall Trap
The unit comprises six (6) parts:
- The Bin
The main body of the device, mounted on legs, which collects the contents of the gallbladders.
- The Lid
The fitted top to the bin which locks in position. The lid incorporates a solid chute and the knife mounting.
- The Knife
The device is designed to take a 25cm blade. The blade tip and full length of the edge to the handle should be maintained in optimum condition. A mounting bracket has been designed for the Victrinox handle (or similar). An adjustable toggle locks the knife in position.
- Mesh Tray
The mesh tray allows the bile to drain off whilst filtering out any solids.
- Gallstone Basket
A mesh basket with handle for easy removal.
- Hair Net (Not supplied)
Standard issue hair net is to be fitted over the mesh basket before positioning in the bin.
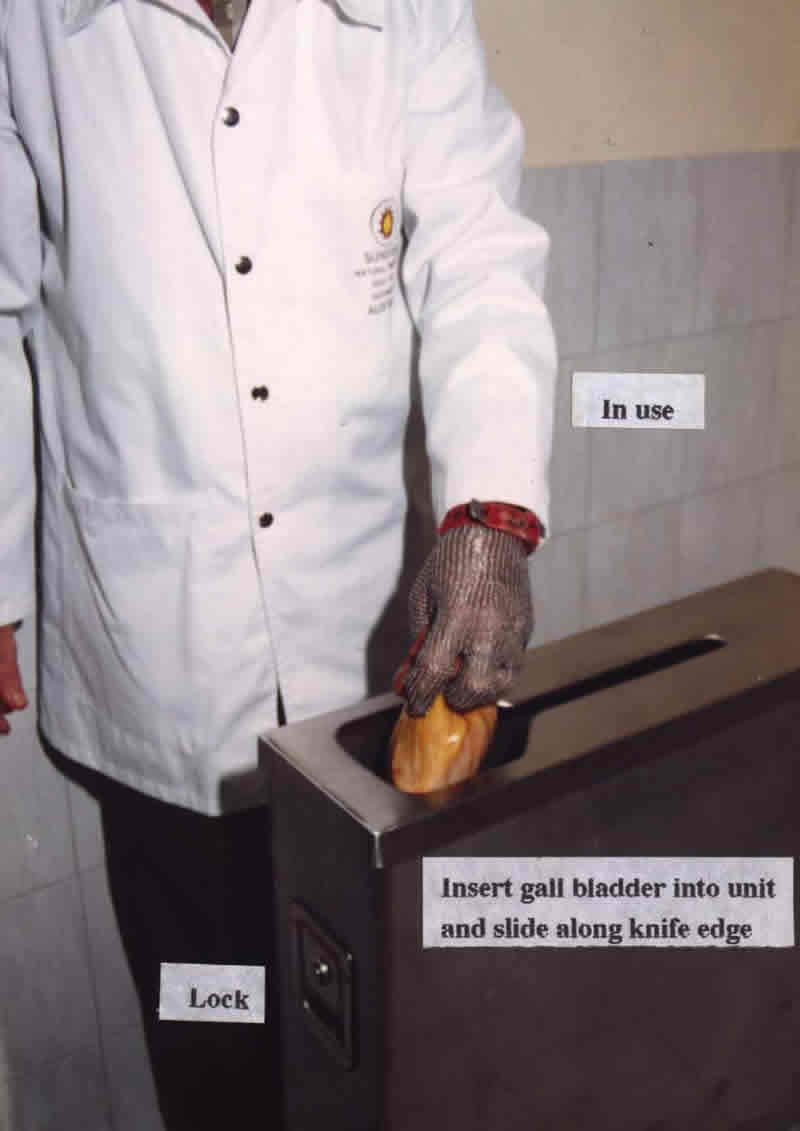
The Gall Trap
- Remove protective packaging.
- Insert key vertically into lock (flat edge up). Turn one quarter turn, anti clockwise to horozontal. Remove key.
- Stand in front of, and facing the unit. The lock will be on our left and the lower drain hole on the right. With left hand raise the latch on the lock. Insert middle finger of right hand in top slot above knife handle. Lift lid using right hand until it clears the edge of the bin, then slide the lid to the right one inch, free and clear of the two small post guides.
- Whilst holding the lid with the right hand's middle finger, support the left hand end of the lid with the left hand. Next remove the middle finger and support the right hand end of the lid with the right hand.
- Lift the lid out, high enough to clear the fixed chute. Then invert the lid and rest it upside down, balanced across the bin. (In this position the knife can be removed for sharpening and replaced)
- Place the lid on the floor before removing the mesh tray and basket.
- To remove the mesh tray, slide it to the left to clear the lower guides. It may take a solid knock to the handle to free it. Lift out by the handle for washing.
- After the mesh tray has been removed, the basket may now be removed. Tilt the right hand side of the basket upwards and slide slightly to the right so as to clear the positioning guides for the mesh tray. Lift the basket clear. Remove hair net.
Re-Assembling The Gall Trap
after installation of the bin
- Wash the unit thoroughly. Fit a new hair net to the gallstone basket, ensuring the net has no holes and is securely fitted over the four (4) sides of the basket. Push the net down into the basket to form an inner lining of the basket. One side of the basket is inclined. Ensure the net is evenly and neatly fitted to this side.
- Replace the basket by lowering it into the unit, holding the handle. The inclined side of the basket should be facing the lock. Hook the lip of the inclined side under the mesh tray guides, then push the right hand side of the basket down into position.
- Replacing the mesh tray is simple, if it is remembered to slide the handle down the inside left hand surface. Do not try to force the mesh tray into position. When positioned flush against the left hand inner surface, guide the lower end of the tray into the guides provided and slide the tray to the right, down the rails into the fixed position.
- Check that the mesh tray, basket and hair net are so positioned to allow free and unhindered passage of any gallstone from the mesh tray into the gallstone basket and hair net. Check the join between the mesh tray and the adjacent side of the basket.
- Lift the inverted lid and balance it upside down across the bin. To fit the knife, first hold it horizontally then turn the blade to face upwards. Place the butt of the handle against the guide provided and push down on the handle into the triangular piece under the block provided. Putt the toggle latch up to the locked position. If the toggle latch does not lock firmly, some adjustment may be required by screwing the triangular hook piece in or out.
- Insert the key. It will go in horizontally. Turn the key one quarter turn clockwise to vertical and remove the key. Check that the latch is in the locked position.
- Replace the lid by first aligning the right hand end with the two small positioning posts. Slide the lid to the left to fully engage the posts. Then drape the lid over over the top of the bin. Check that it is firmly locked into position.
|
|
Cleaning The Gall Trap
- The trap must be cleared and cleaned daily.
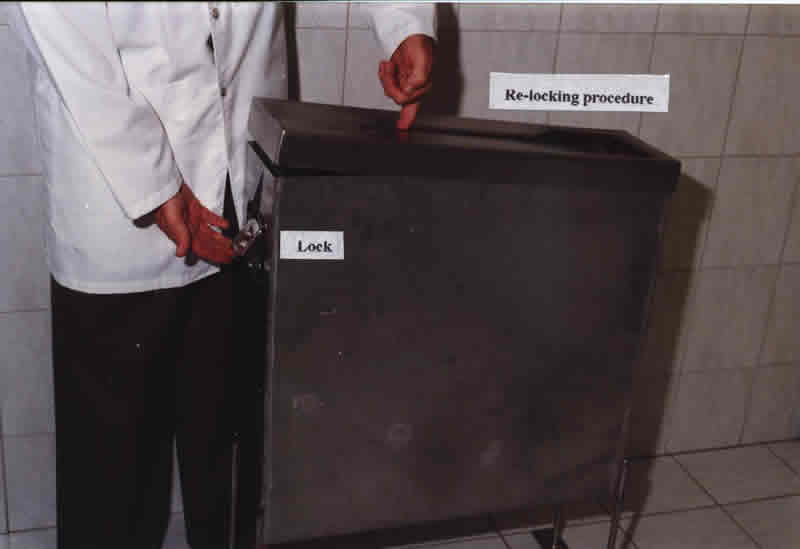
- Unlocking and relocking procedures should be clearly understood and carfully monitored. The unit should be unlocked, the top released and the latch relocked immediately.
- This should be done by inserting the key vertically (flat side up), turning one quarter turn anti-clockwise to horizontal before releasing the latch. After releasing the top (middle finger in slot above knife handle), the key should be turned one quarter turn clockwise to vertical then removed. This way the unit will automatically lock when the top is replaced after cleaning.
- Remove the top by sliding it to the right, clear of the two positioning posts, before lifting it up clear of the fixed chute.
- Next the mesh tray is removed by sliding it to the left, flush against the left inner side, to clear the lower guides, before lifting out by the handle.
- The gallstone basket is removed with the hairnet in place. Tild the basket to the left by dropping the inclined side and raising the right hand side of the basket. With a little manoeuvering the basket will come free and can be raised out of the bin by the handle.
- Remove the hairnet carefully, leaving the stone in it. When freed from each side of the basket, lift out the hairnet and rinse the net and its contents in clean water. The net and contents should then be removed from the slaughter floor to the secure drying area.
- Before leaving the slaughter floor, the latch should e checked again to see that it is in the locked position.
- After washing the unit and its removable parts, the knife should be removed for sharpening and replaced. A new hairnet should be placed over the basket and the unit re-assembled and locked ready for the next day.
Precautions
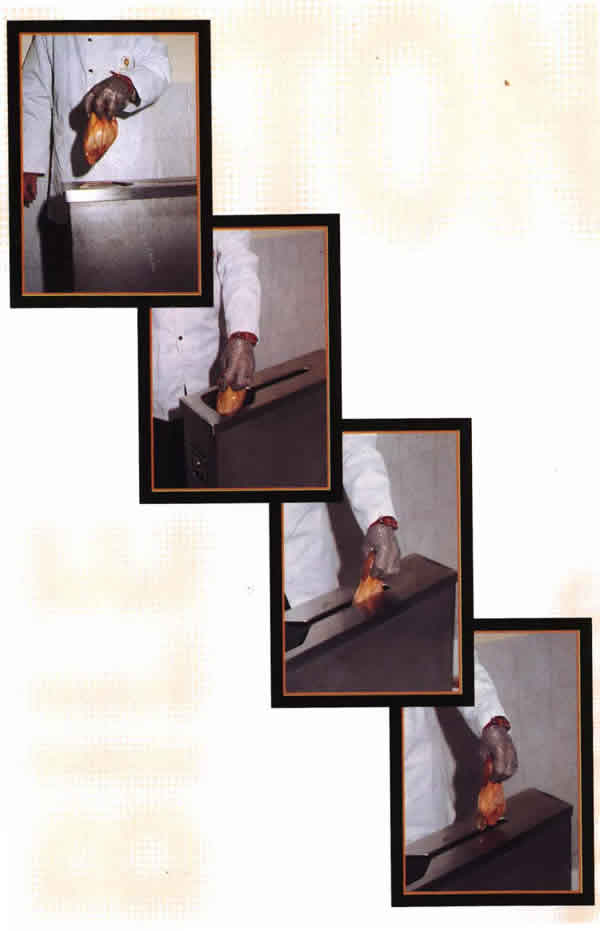
Design of a "foolproof" system is almost impossible. This unit is not expected to cope with some situations. The unit is not designed to function correctly if whole gallbladders are dropped in the unit without being ruptured. Likewise excessive numbers of empty bags will fill the basket. Gallbladders dropped in the unit, accidentally or otherwise should be monitored.
|
|
